Tuesday, 8 January 2013

Nail Art - Strawberries

Strawberry nail art using GOLD by Giles range and nail art pen

Today I have a blog post on how to make Strawberry nail art. It is fun, fairly quick and doesn't require too many things.

You will need:
1 x base colour, 1 x red polish, 1 x green polish, 1 x nail art pen (I have used my black models own one)

Okay... here we go :)

Paint your nails in the base colour all over the nail and when dry, paint them completely red
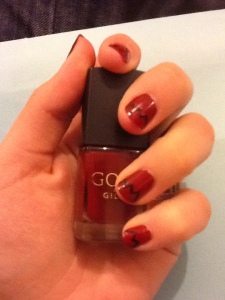


After doing this as you can see on the picture above I have drawn using my nail art pen the shape of my strawberry leaves. You can make every nail uniform by choosing a set amount of leaves, or just wing it and change it up every time. Both will look fine as long as you try to keep it within the top third of the nail.

Use the black outline almost as a guideline for when painting the green which represent the leaves.
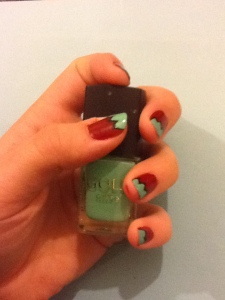


After this you can put in as much or as little detail as you want... and then hey presto you have strawberry nails that everyone goes crazy for.
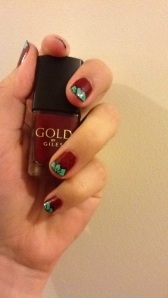


The red and green varnish I used for this demo is from Giles Deacon and is available at New Look stores and the nail pen is Models Own which can be found in Boots.

Good Luck trying this out and do send me pics or your nails :)

FF x
Paint dripping nail art effect

Here is a quick blog on how to achieve the paint drying effect nails.


You will need: 2 x nail varnishes
This blog is short and sweet and doesn't really have much to it so you won't need tools or marker pens :)

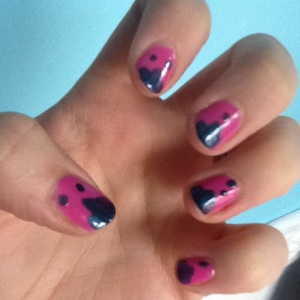
Firstly paint your nails in the base colour of choice. I have used the GOSH pink as I love it.
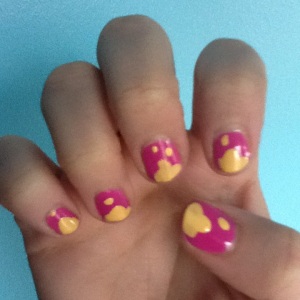
When dry apply the second colour in this case the yellow from the MUA love hearts collection (available at superdrug) to the tip of your nail with a short stroke to the left, a longer stroke in the middle and a short stroke again to the right.

As you can see above, this makes it look like you have a blob of paint on your nails.

To finish the look simply add spots of colour in a drip shape way to add to the effect of paint running down the nail. You can make all nails uniform in size and shape of go wild and experiment on each nail.


Alternative designs would be different nail colour on every nail or mix and match paint colour but keep base the same, but with such simple application you can whatever you feel like.
Have fun and let me know if you try this yourselves. Also if you have any looks you've been working on and need advice let me know :)

FF xx

Barry M - Magnetic nail effect varnish

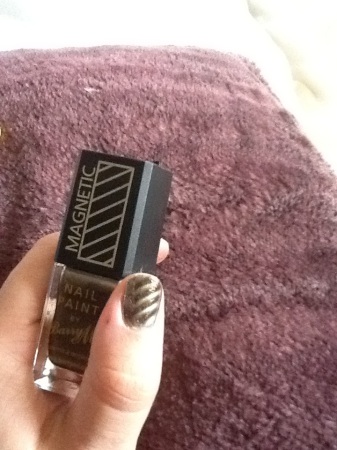
Afternoon peeps another quick blog using my new varnish from Barry M, which boasts magnetic changing colours, so lets have a look.

Not bad, Barry M, not bad at all.

To do this look you will need:

1 x base colour varnish
1 x magnetic nail paint from Barry M
Apply the base colour to your nail and allow to dry.

Note: When applying the Barry M magnetic nail paint do one finger completely with the varnish and then use the magnet immediately or the effect does not work very well. I found this out the hard way by painting all my nails and then using the magnet!!

I must admit this is a clever and quick way to create nail art that is eye catching and easy to do.
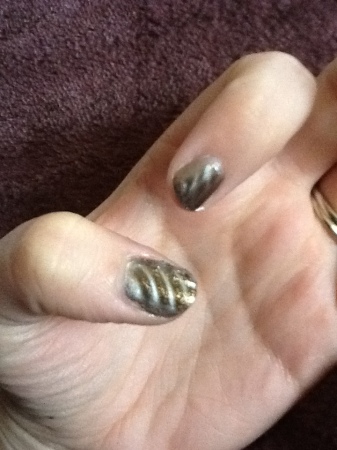
Pull the top cap off the varnish which holds the magnet and leave to one side within easy reaching distance. Apply the varnish to the whole of the nail and then immeditely hold the magnet over the nail for a minute while the effect starts working. It should do this straight away, if it doesn’t you may have waited too long, but no fear just wipe off and start again :)

As you can see the pattern of my nails is exactly the pattern of the side of the magnet cap and that’s all there is to it. Paint over with a clear polish if you wish and go and show the world your new nails.

Happy painting

Here is the link to the Barry M website for those wishing to purchase this varnish and note the different effects to make sure you pick the right one :)
http://www.barrym.com/products/nails/effects/magnetic-nails.html

Please share, link, tweet, facebook etc etc so I can enter into world domination and also send me pics or ideas that you've tried or suggestions for new posts. Lets bring on 2013 together :)

FF xx

Popular Posts