Saturday, 9 April 2016

Back to the blog

Hello everyone

Did you miss me? Wow time flies it feels forever since my last post. Lots have been happening here and at some point I will go back and upload the shoots and pictures from what i've been unto, but for now let's get to this week. I had an amazing opportunity to work with the great Chris Kelly on a tribal shot this week and I already have a photo to show for it that I can share with you.

Photographer and headpiece provider: Chris Kelly
Makeup hair and styling: Vicki Frost MUA
Model: Shawna Leigh
Also a big thank you to Matt Leach and allowing us time in his studio.


We did think all was lost when unfortunately the model booked had to cancel, but the amazing Shawna Leigh was able to stop in last minute and the day was saved. We had decided on a tribal shoot and I really wanted to go quite simple yet effective with the makeup, which I think i've achieved :) and we had a headdress at the ready which is gorgeous. This was also the first time I shopped for the outfit and accessories which I actually liked more then I thought I would. Primark has a really good tribal, boho selection at the moment and a massive tribal, festival, aztec collection of accessories which gave me more than enough to choose from.

Shawn has really good skin anyway so I really didn't need to use corrective concealers and with the shots I had in mind I didn't want to use blush and just focus on natural colours to complement the aquacolor detail. I used my Illamasqua skin finish foundation and buffed it right onto the lips to take some of that colour of the lips out. The Urban Decay Naked Palette 2 made for an easy eye colour and then the white aquacolor by Kryolan, which I applied with a very fine brush over the bottom lip down to just under the chin line and then circles drawn over the top of the eyebrow on the right eye and to the side of the eye on the left. I loved making the eyes different so I wouldn't get a symmetrical image as she moved in front of the camera.

For the hair I had brought some brown cord from Hobbycraft and tied it around a section that would be in shot and then I put the headdress on her to check where I should add texture to the hair. I clipped in a feather piece on the right side and plaited small sections using various braids to add texture and then she was ready to go.

The simple makeup allowed us to try three different outfits and three different hair stylings with and without headpieces and headbands and yet keeping the essence of the look the same. On the last change of clothing and hair placement I touched up the lip line and added drawing out that chin line and bringing it around the left side the face and up towards the ear just to provide alternative shots.

Here is the first shot I have received from the shoot and I will edit and upload some more when I get them. Feel free to follow us all on Instagram @vickifrostcollege @gingerjam @princessshawniqua or comment and share the post.

x v x


Tuesday, 15 April 2014

Pick of the week August 2013

Hiya

I was worrying a couple of months ago that I couldn't find anything that was really my style in the shops and was starting to wig out a bit, but fear no more as there is so much style I love out at the moment  i'm spoilt for choice.

I think i'll cover a bit of everything today from fashion to make up to give you a heads up of some of the good stuff :)


Lips: Now it's true I have a bit of a thing (crush) on OCC so i'm of course putting in a link to their lip tars, but just be warned they come out the colour as on the tube. Let me be clear these are high colour lip glosses that look amazing on shoots and photos, but may not be your cup of tea for a day at the office. Then again that would depend on your office :)

http://www.occmakeup.com/lips.html This will take you straight to the lip page on the American site as i'm aware a lot of readers are from that neck of the woods.


Blogs: 

Kenza Zouiten and her blog on style and fashion
 
I think her blog is super cute and it I think one of the biggest blogs in Sweden at the moment. She's like a daily does of what to wear and will take pictures and show what's she's wearing and who by.
 
 
Obviously the blog is in Swedish as that's the language she writes in but have to fear if you are not fluent as the Google translate bar is on the left hand side of the blog which will convert it into any other language. I have translated it and hopefully pasted the blog's English version, but we will have to see if it works. I'm not the best with technology as you are more then aware.

 Sea of Shoes is the personal style blog of Jane Aldridge.

She has a blog out a while back about Patti Hansen and it's lovely to see some timeless beauty from the past being brought back to focus

Here is the link to her site and this blog article
https://www.bloglovin.com/frame?post=1473978103&group=0&frame_type=a&blog=35152&link=aHR0cDovL3d3dy5zZWFvZnNob2VzLmNvbS9zZWFfb2Zfc2hvZXMvMjAxMy8wOC9wYXR0aS1oYW5zZW4tc3R5bGUtaWNvbi5odG1s&frame=1&click=0&user=1996216

 xx v xx

Facebook: Vicki Frost MUA
Twitter: @frostinator

Freelance Makeup Artist

Hi all.

Wow i am so beyond being tardy on my blog upkeep. To be honest my world has kind of been a whirlwind of opportunities and work and childcare planning and diet coke over the last couple of months/ the whole of this year - i cannot believe it is April already!

So as you know i started this blog to discuss fashion and trends, but it turned out i liked to write more about what i had seen and what i liked more then maybe what was in style ha, so i branched out a little into some tutorials of nail art and wrote a little about my blogging and the events i was blogging for.

That was great for a while, but the passion for makeup and hair styling kind of over ran everything else and left me at home practising on anything with a face, including my boyfriend instead of honing my writing craft and writing my blog.

I have been very fortunate that my makeup ride has been a great one and I feel i have done very well for myself in the short space of time that I have been in the makeup industry. I'm planning on writing some more blogs on makeup as i seem to be far more knowledgeable about how to apply eyeliner and the eye makeup on the catwalk then i am about the outfits and what colours to wear. However for those of you that use me as a style bible (yes sarcasm) i will stick my 2penneth in when i see things i like and don't like.

3.1 Phillip Lim The Pashli mini patent-leather trapeze bag This for example 3.1 Phillip Lim handbag is so stunning it makes my brian hurt. Granted the bag would not sit so well over my denim cutoffs and flouncy blouse but i would cherish that bag to the point where only my fave lipglosses and one kids toy would be allowed santuary in there.
For those of you interested it can be found on net-a-porter's website http://www.net-a-porter.com/Shop/Designers/31_Phillip_Lim/Bags?level3Filter=&pn=1&npp=60&image_view=product&dScroll=0 in case any of you lucky ladies, or metro's out there happen to be earning some extra money and are looking to treat yourself.

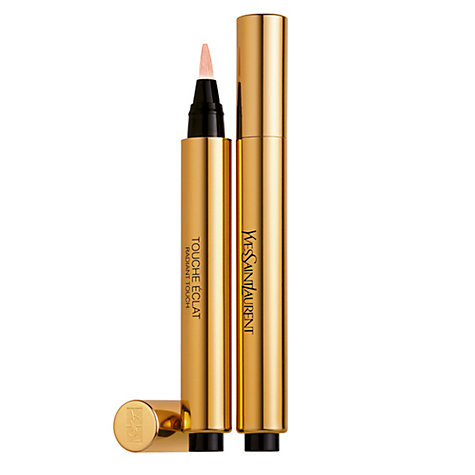
Buy Yves Saint Laurent Touche Éclat Complexion Highlighter Online at johnlewis.com
Touch Eclat by YSL is my make up must have of today. Light diffusing gorgeous coloured highlighter that can be applied under the eyes, similar to concealer but that really wakes up the eye and brings that glow to the eye area.
It can be found anywhere really but for arguments sake i've included a link to the John Lewis site
http://www.johnlewis.com/yves-saint-laurent-touche-eclat-complexion-highlighter/p37503?kpid=230645616&s_kenid=6a891f15-b10f-6249-8b54-000025a59fb1&s_kwcid=106x65643&tmad=c&tmcampid=73

So there we have it kids. Any questions please do e-mail me or send them over via a comment and if i know the answer or the way to achieve a certain look i will gladly answer it for you

xx v xx

Facebook: Vicki Frost MUA
Twitter: @frostinator

Thursday, 8 August 2013

School braid idea. Frech plait with a twist

Afternoon all.

I felt like being creative the other day and what better excuse to plait then my daughter getting ready to go to 'big school.' She has fairly long hair now after going through a 'Rapunzel' phase and wanting it down to the floor, but it does make it easier for it to become tangled and knotted.

The plait I'm talking about today is a plain and simple French plait method. Three stands with either the right or the left being fed over into the middle each time.

Photo: Nothing beats being creative in the morning xx

The key to achieving this is to have three bobbles and a comb. That's it... and hopefully a child like mine that is happy to watch cbeebies while you faff around with their hair :)

Start by using the comb to section the hair in a middle parting. I usually use between the eyes as a starting point for my comb to make sure it ends central. Once the hair is in two sections, tie one half up with a bobble out of the way.

With the section that is left divide in half vertically. Beth way is start at top of ear and work across until you get to the parting. The secure the top section ( roughly 1/4 of her hair) into a bobble. Repeat on the other side and you can see in the picture the top two bobbles.

Now comes the tricky bit.

Take half the hair from each bobble and divide in your fingers so that you have three sections. Start a regular plait taking the hair over and once you have done this on the right and the left, now each time you cross over you also add in hair from the hair left underneath.

The best way is to think of a French plait where hair is added over each time, the same applies except the hair is held in the middle away from the head and not against the head. As you add in sections to the plait the smaller the sections the more intricate the plait will look.

When you get to the bottom, secure with a bobble and all hair should have been used. It may take a couple of attempts but please do try and it's can be done in less then 10 minutes once you know what you're doing.

If you have done one do send it to me or leave a comment below :) Also leave comments on any blog posts you would like me to consider writing about

www.facebook.com/vickifrostmua

FrostinatorFashion xx

Braiding during a lunch :)

Hi all

I admit I have been away a loooong time, my apologies.

I thought I would start back with a snap shot of a quick plait I did on a friend of mine during a catch up session. This is a normal French plait plain and simple. The trick to this is simply to plait the hair under the other two strands everytime instead of over.
French plaits can be plaited over or under, but I do like plaiting under to see the polished version where the braid site on top of the head instead of underneath. It's so pretty :)


I will be doing 'how - to - blogs' on a number of hair and make up queries as I know a lot of people are unsure about how to plait etc. So here is a taste of what's to come :)

Obviously with sprays, products, or even hairspray those wispy hairs can be put and kept in place, but when you have just a hair bobble/scrunchie a good look can still be achieved.

www.facebook.com/vickifrostmua

FrostinatorFashion xx

Tuesday, 8 January 2013

Nail Art - Strawberries

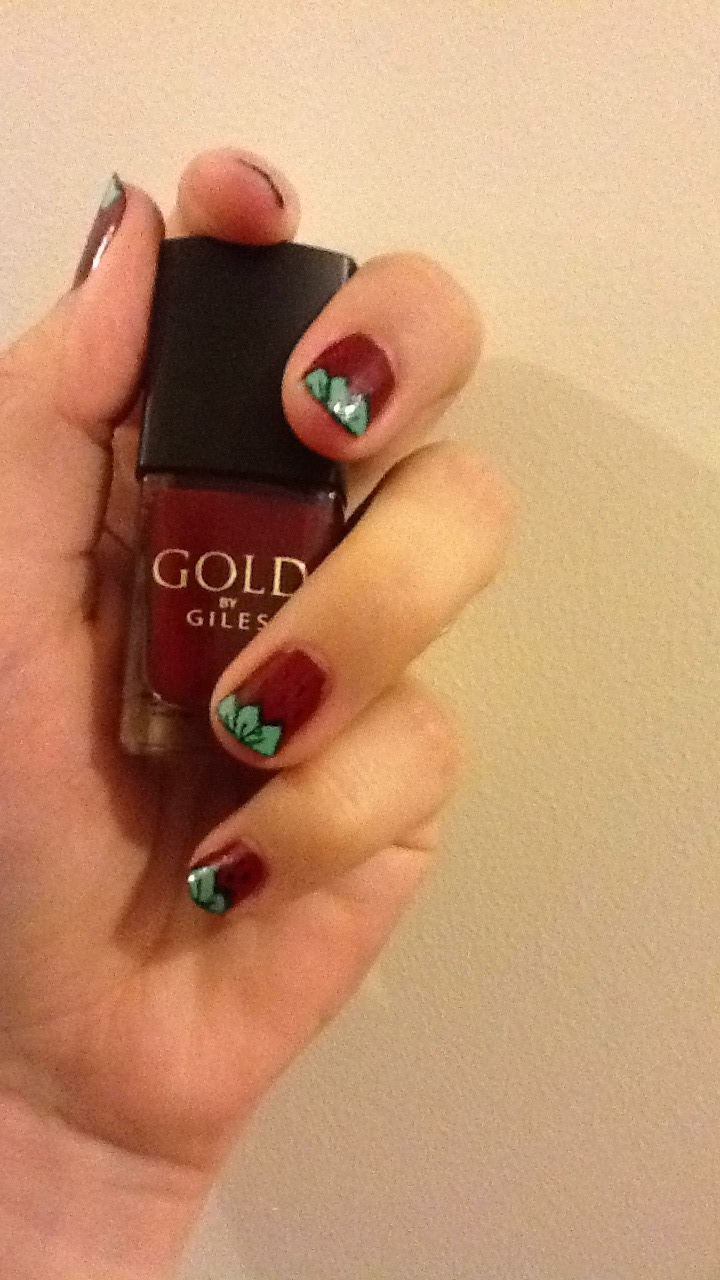
Strawberry nail art using GOLD by Giles range and nail art pen

Today I have a blog post on how to make Strawberry nail art. It is fun, fairly quick and doesn't require too many things.

You will need:
1 x base colour, 1 x red polish, 1 x green polish, 1 x nail art pen (I have used my black models own one)

Okay... here we go :)

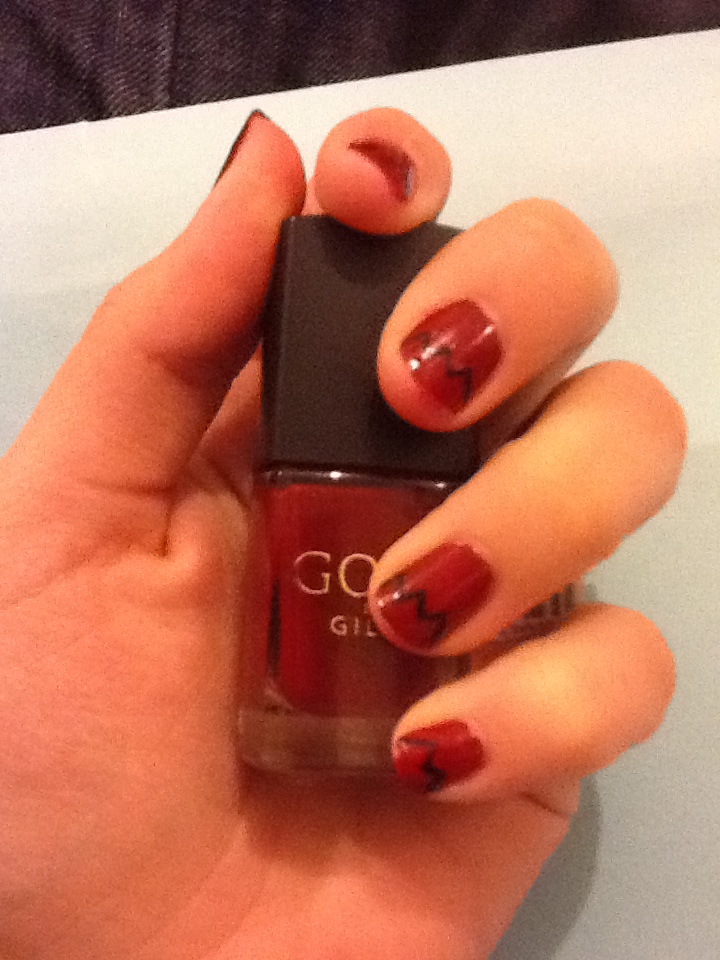
Paint your nails in the base colour all over the nail and when dry, paint them completely red


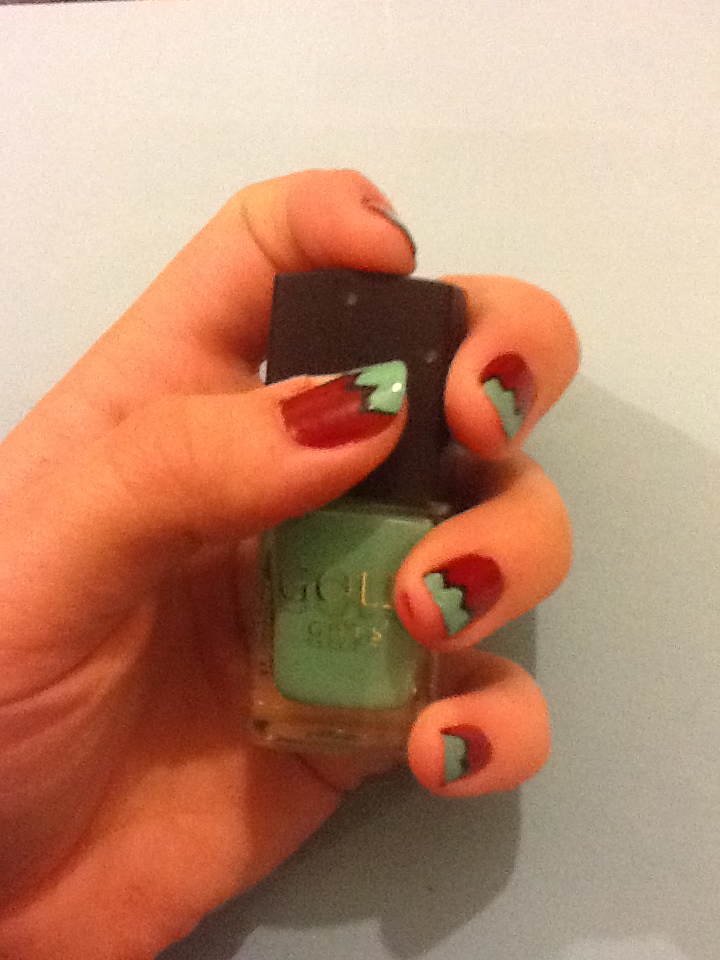
After doing this as you can see on the picture above I have drawn using my nail art pen the shape of my strawberry leaves. You can make every nail uniform by choosing a set amount of leaves, or just wing it and change it up every time. Both will look fine as long as you try to keep it within the top third of the nail.

Use the black outline almost as a guideline for when painting the green which represent the leaves.


After this you can put in as much or as little detail as you want... and then hey presto you have strawberry nails that everyone goes crazy for.


The red and green varnish I used for this demo is from Giles Deacon and is available at New Look stores and the nail pen is Models Own which can be found in Boots.

Good Luck trying this out and do send me pics or your nails :)

FF x

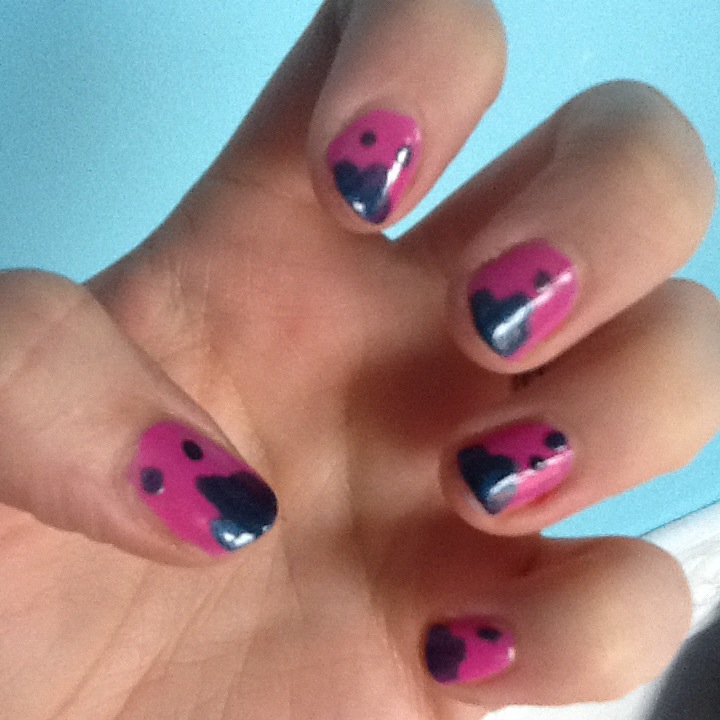
Paint dripping nail art effect

Here is a quick blog on how to achieve the paint drying effect nails.


You will need: 2 x nail varnishes
This blog is short and sweet and doesn't really have much to it so you won't need tools or marker pens :)

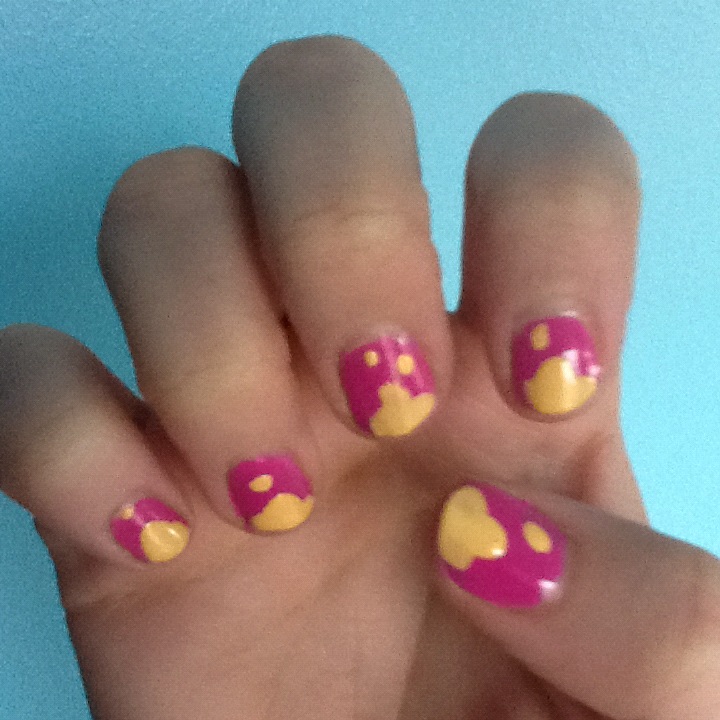
Firstly paint your nails in the base colour of choice. I have used the GOSH pink as I love it.
When dry apply the second colour in this case the yellow from the MUA love hearts collection (available at superdrug) to the tip of your nail with a short stroke to the left, a longer stroke in the middle and a short stroke again to the right.

As you can see above, this makes it look like you have a blob of paint on your nails.

To finish the look simply add spots of colour in a drip shape way to add to the effect of paint running down the nail. You can make all nails uniform in size and shape of go wild and experiment on each nail.


Alternative designs would be different nail colour on every nail or mix and match paint colour but keep base the same, but with such simple application you can whatever you feel like.
Have fun and let me know if you try this yourselves. Also if you have any looks you've been working on and need advice let me know :)

FF xx

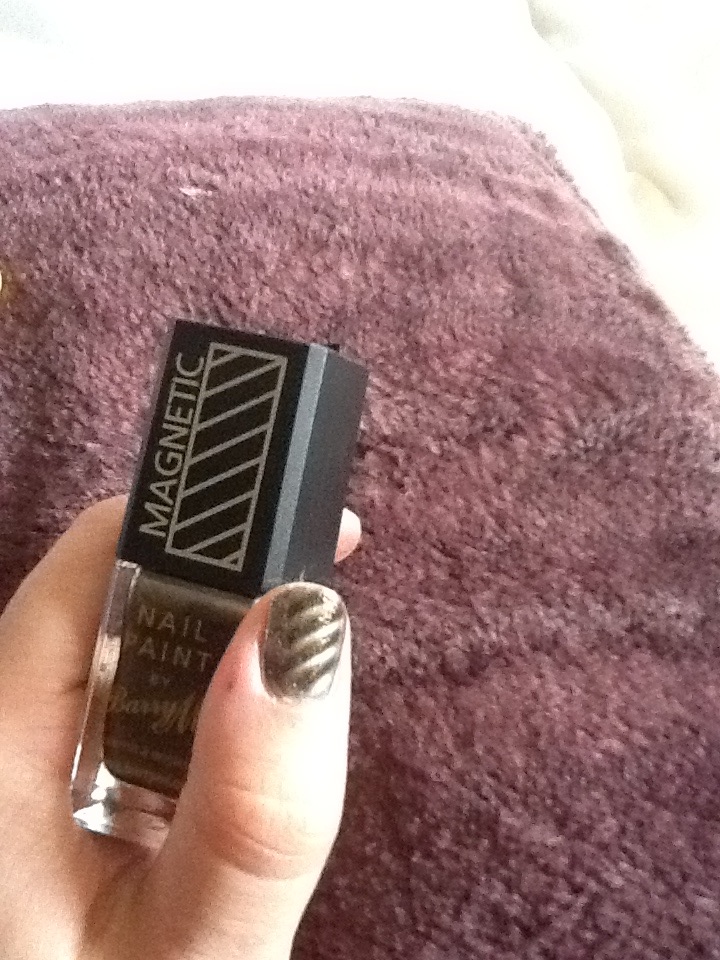
Barry M - Magnetic nail effect varnish

Afternoon peeps another quick blog using my new varnish from Barry M, which boasts magnetic changing colours, so lets have a look.

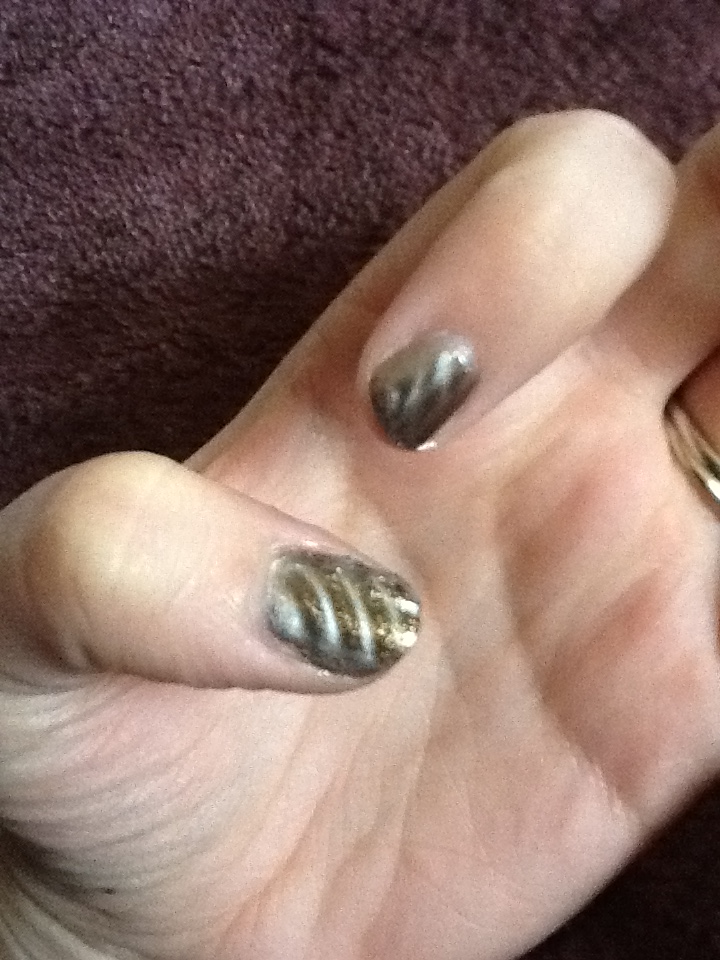
Not bad, Barry M, not bad at all.

To do this look you will need:

1 x base colour varnish
1 x magnetic nail paint from Barry M
Apply the base colour to your nail and allow to dry.

Note: When applying the Barry M magnetic nail paint do one finger completely with the varnish and then use the magnet immediately or the effect does not work very well. I found this out the hard way by painting all my nails and then using the magnet!!

I must admit this is a clever and quick way to create nail art that is eye catching and easy to do.
Pull the top cap off the varnish which holds the magnet and leave to one side within easy reaching distance. Apply the varnish to the whole of the nail and then immeditely hold the magnet over the nail for a minute while the effect starts working. It should do this straight away, if it doesn’t you may have waited too long, but no fear just wipe off and start again :)

As you can see the pattern of my nails is exactly the pattern of the side of the magnet cap and that’s all there is to it. Paint over with a clear polish if you wish and go and show the world your new nails.

Happy painting

Here is the link to the Barry M website for those wishing to purchase this varnish and note the different effects to make sure you pick the right one :)
http://www.barrym.com/products/nails/effects/magnetic-nails.html

Please share, link, tweet, facebook etc etc so I can enter into world domination and also send me pics or ideas that you've tried or suggestions for new posts. Lets bring on 2013 together :)

FF xx

Friday, 10 August 2012

Japanese street style, Anime and Sushi Make Up...

Part of why i love fashion and make up so much is that you can be yourself, and even if you don't have the self confidence to talk that way you can still dress or make it how you want others to see you.

Every person is a blank canvas with varying features and characteristics that make the who they are. No-one is perfect and it should be the stand alone features that we embrace and use as our strong point in our identity.
I think this is why i enjoy fashion so much as everywhere you go has something else to offer and one of my favourite places to find individuals happy to express their own style is Japan.

Today i have chosen to do just a quick blog on Japanese street style, anime make up and japanese food brought to print, but all that will be revealed later.

Every country has their mainstream fashion from their high end couture and expensive designers, to the high-street copies to the markets and dens of hidden treasures. For me accessories found on lots of japanese street style wearers makes me think of my young trawling through Camden Town looking for treasures.
120708-1189 Twitter @shiari0214
FASHION JAPAN: Miu (Shiari) (Harajuku-Tokyo-Eri-Baby The Stars Shine Bright-Angelic Pretty)
Miu Shiari shows off her unique style here with a lolita look and looks stunning.
The japanese street style takes things and brings them out during the day, where we otherwise would keep them for behind closed doors for fashion shoot ideas. I love that this look is just out and wandering around in Tokyo, but more then that it won't completely stand out as an oddity.

Miu looks like a porcelain doll, but with the shoes and briefcase bag updates it to a working wardrobe piece. Its the kind of outfit i would love to wear but know that i would stand out a little too much in my office with this on.


120624-9782 - Japanese street fashion in Sangenjaya, Tokyo (Hawkins Sport) @sxexnxa
FASHION JAPAN: Senna (Sennanan) (Setagaya-Tokyo-Hawkins Sport)

This style has incorporated the more traditional element of the kimono, but mixed it up with pop culture, manga and a whirlpool of other influences. The Japanese street style dress and make up all help the individual express their identity though their appearance and you gain so much insight into them without even speaking to them.

p.s. here's a link to a great Japanese street style blog http://www.japanesestreets.com/photoblog/

The traditional Japanese pop culture for example anime cartoons always picture girls with massive doe eyes and tiny lips and a lot of art and make up has been done to help achieve this look. Just for fun with some basic make up, face paint and a sister to volunteer I did this DIY version.

Please note i am not yet a professional make up artist and this was done quickly in my home with what i had to hand at the time, so the look can indeed be more intense with say Kryolan make up, but for now this will do.


By using the line of the eyebrow and turning it into the top of the eyelid it made a great stencil to base the dimensions for the rest of the eye. Fake eyebrows can be drawn above, just try to make sure they match. I found it easiest to draw a midline and then make thicker as desired.

For those that can't see - her eyelid is where the white bubble is. Most of this was done with one of my fabulous Giles Gold range eyeliner pens which can be found in New Look for a couple of pounds and the blue was a glitter eyeliner from the glam metallic Collection 2000 range.

The lips are the beautiful OCC cosmetics in BETA which is the most professional make up I had on me at the time, plus the fact that i adore them. Please note they are very bright and a little goes a long way :)

 Underneath i had an eau la la lip liner in pumpkin and i made sure to only use half the lips and to white the rest out with face paint to get that doll-esque lip.

Now if you do try this look, please send me a picture or a link or whatever as i love to see what you create yourselves. I mentioned before that everyone is a canvas and its true. Anyone can re-create this look, or put a spin on it and reinvent it to match your style.

Earlier when i was discussing Japanese street style i mentioned how a lot of influence can be drawn through its heritage, culture and even food.

This brings me to my last segment on this Japanese themed blog which is the wonder that is Karla Powell and some the fan-tabby ideas she can create from something as simple as sushi.


This picture is taken form Karla's Food project portfolio, where a number of foods had their looks brought into a fashion shoot, but with a twist, or in this case i would say a roll, but we all know that would be a very bad sushi joke!

The model here is Melissa Hargreaves from Alpha Agency and even though the theme of this piece is food, she looks absolutely stunning. The food which is wrapped into the hair with appropriately placed chopsticks features a lot of colour and vibrancy which is then translated into the make up look here .

 @karlapowellmua


This model has turned from a blank canvas into a stunning and probably tasty piece of art. Even with all the colour focusing on bold eyes and lips it is not overdone and the sequinned brows and nails are just great (i may have to try these out in the future), but it goes back to what i was saying about expression.

Whether it be clothes, make up or even food, japan has a great deal to offer in the realms of fashion and make up and i hope that more people see Karla Powell's work and transcend it into their street style. Maybe not to this extreme, but just think of what we could be seeing in a couple of years as they new generation start asserting themselves.

To see the whole range of food project portfolio and to see the breakdown of make up used to achieve this look please see karla's blog http://www.karlapowell.co.uk/post/20472249775/creative-makeup-sequin-eyebrows-nubar-sushi-makeup-nails

To conclude my blog today i would say that I love how simple ideas can be the ones where looks like the above can be achieved. I really like seeing people being able to express their ideas and identity through these mediums and its great to see this type of self expression and the want to push normal boundaries.

If you have liked this piece please do leave a comment or RT or e-mail or any other of the hundred mediums in which you can now talk to people.

Frostinator Fashion xx

Friday, 13 July 2012

Feather Nail Art

Hi All

Yesterday i uploaded a pic of my new feathery nails and so this blog is to just show how easy it is to do.

To do this you will need:
Two coloured varnishes and in my case i have used the MUA Cosmetics Love Hearts Purple 'U ROK' and GOSH bright pink 'Flamingo' for contrast.
3D nail accessories stickers which i actually got from e-bay ( i love that site)
A pair of grooming scissors, ( the mini ones you use in the bathroom) or nail scissors
Finally a top coat. It can be clear but i used the N0.7 top coat which has glitter in it.


Okey Kokees here we go and don't worry the design is very simple it doesn't takes too much time. Plus it looks awesome when complete so just imagine all the 'oh my god, who did your nails? ':)


Out of the two colours that you've picked, choose the one you want to the more of to paint your nails in a full coat. In my case i painted all my nails in purple. I'm going to assume you have all painted your nails before and so don't need a diagram, just remember centre stroke, left, right and then centre again if it needs it.

Once that is dry get your other colour varnish. Dip the brush in and brush of excess and then draw one line down the centre of oyur nail. For this design it doesn't matter of they are all exactly the same width or whatever as you're putting the sticker over most of it.

Wait for this to dry. You make think it sounds redundant, but it's easy to speed up and end up catching bits and making it look patchy before it's finished.

It should look like this


Mua U ROK is available from superdrug outlets that stock the MUA range or from their website for only £2 each http://www.muastore.co.uk/index.php/love-hearts/love-hearts-nails

Gosh Flamingo is available also from superdrug or online at www.goshcosmetics.com but i do know that they are on sale now for £5 here http://www.superdrug.com/search?q=GOSH#search?q=GOSH&type=makeup16&_suid=134219708481008489988825958796 so go get yourself a bargain

Then comes the trickiest bit, the stickers.

You can do this two ways. The easiest for me is to apply the sticker where i want it and then cut off the excess around the top of the nail, but you can measure the sticker and cut it down to size first as long as you are careful not to let the sticker touch the varnish, or it will stick to it.

Moving swiftly on. If you look at the sticker packet above you will see there are 12 stickers and of course you should only have 10 fingers, so that means you will have 2 left over for another day, or you can double design on two lucky fingers.
The two at the bottom that look like peacock feathers were the biggest and so i used these of the thums.

Peel the sticker off the backing and line up the bottom of the sticker with the bottom of your nail. Press down and work your way up until you get to the top of the nail as this will make sure the sticker applies flat to the nail, doing it all at once can leave creases or bubbles.

You can choose which sticker you want for each nail, but usually i follow down in size so longest nail will have longest sticker etc etc.

When all done it should look more or less like this


You then apply the top coat to seal the sticker in place. If like me you want that bit of sparkle, just remember to wipe off the excess glitter first as you can always apply more, but theres nothing worse then achieving a great look and then putting too much glitter on and ruining the effect. Yes, this may have happened to me before and so it is possible this is sage advice from someone that has learnt the lesson the hard way :)


I really hope you've enjoyed this little blog and remember to show me any pictures of you try it out yourself, either by a link in the comment box or via email.

Happy Feathering

Frostinator Fashion xx

Thursday, 5 July 2012

Crazy for Ombres

Hi all.
I know it's been over a month since my last post (slaps self on wrist) I do apologise but I have been lost in my own little world of social media and feel like Alice down the rabbit hole.

For someone addicted to all things fashionable having an i-pad where you can summon pin interest, twitter, facebook, instagram and ebay at the touch of a button leaves me with many new purchases and 'virtual friends' but without time to actually write about the things i'm doing. Then of course my actual job and my two kids are also factors in my busy days hahaha :)

To get to the point of todys post, i'm in LOVE with everything 'ombre' at the moment. Ombre is a spanish word which basically means gradual transition of colour. You will no doubt have seen ombre hair, nails, lips and eyes, so below i've included a picture below of a very quick way to achieve the look.


To achieve this is simple enough and you can do nay number of combinations.

1: Here I lined the bottom lip with an orange liner and filled in the lip
2: Then Line the top lip with pink liner and fill in the lip
3: If you need the colour to be brighter you can use a lipstick and i did this with the top lip
4: Go over the bottom lip with a gloss with a colour that matches the liner
5: Do this on the top lip with a colour to match.
6: Purse lips together and voila

The colour fromt he top and bottom lips should merge slightly so there is a gradual change in colour.

Alternatives to this would be to shade both lips in one colour but leave a small area in the middle for a lighter shade, or add a white liner to the top of the top lip to heighten the effect.

I know this post is short and sweet, but i'm getting into a nail art, hair do phase and there will be many posts coming in the future. :)

I hope some of oyu try this and do let me see the photos.

Frostinator Fashion xx

Sunday, 29 April 2012

Scarlett Hearts

You should know by now that I love my unique pieces of jewellery as I like buying something I feel a connection too. Don't get me wrong I will buy accessories from every high street store known to man, but I prefer finding pieces that I really like i.e. Danielle Stevens, Sweet Lily Sparkles and now Scarlett Hearts.

Here's an idea of what i'm talking about:
Image of Rosy Pins Image of Admit One Cat Image of The seamstress
£4.00 Rosy pins                   £5.00 Admit one cat necklace  £5.00 Seamstress necklace

Image of The all-seeing eye Image of Little red Image of Gemstone collar
The all-seeing eye £4.00     Little Red ring £3.00            Gemstone collar £4.00

I mean seriously, I love this place and the ones above are the ones I haven't brought... yet :) http://scarletthearts.bigcartel.com/category/necklaces

The gemstone collar is super cute and it's one of the new trends we've seen creeping in recently.

I did get my pieces just in time for Manchester Fashion Week and so here I am.

By the way it is very hard to take a picture of yourself this way and yes my hair does look different.
Here I am wearing New Look dress, Eve's legwear tights, River Island shoes, Nica satchel bag, a random jumper because i wanted colour that day and my Scarlett Hearts glasses necklace. It was beyond freezing in that place and so jumpers were a must have.

Right focus... my geek glasses necklace looks like this up close
available for £5.50, i know bank breakingly expensive (yes, that is a joke about breaking the bank, the price really is £5.50 though :))

There's a lot of Keep Calm and (varying last words) items in circulation at the moment, but I really liked this necklace and all items come in these little pouches. Cuteness!!
 

I don't normally go for jewellery with very long chains but for these pieces I didn't mind and i've tried to get as close as I can but still keeping the words in focus.
 Keep calm cameo £7.00
Available in a range of colous as well.

This last piece is my favourite and everytime I see it I still get that ooh love it so glad I brought it feeling.
 
The odd nails are because I took these whilst styling my nails for the MUA crackle varnish (which is awesome by the way.) Ride my Bike can be brought for £4.50.

So go my pretty people onto the Scarlett Hearts site as you're on the internet already you might as well. Do let me know about the things you get, or the pieces you have already as I can always add pictures to this blog later.

To send you on your way I will finsh with these other brill pieces.
Image of What's the time? Mens What's the time watch necklaces £3.50
Image of Milk-toof Image of Doll house ring Image of Gingham
Milk tooth ring £3.50          Dollhouse rings £7.00 ha i just love it!              Gingham bow £4.00
  Image of Typewriter key rings         Image of Brown Owl
typewriter key  £5.00                   Brown Owl necklace £4.50

I could go on all day as I really would and probably will buy almost every piece.
http://scarletthearts.bigcartel.com or find her @scarlettheartsx

Enjoy

FrostinatorFashion xx

Remember if you like the blog leave a comment and tell me so xx

Saturday, 21 April 2012

Masato - Manchester Fashion Week

Yes it may have taken me a little while to get all theses posts up from Manchester Fashion week, but I do like to do a whole piece and not just something resembling a picture book.

Masato was one one of the first piece I did way back when I started my blog (January 2012) and it's lovely to be able to see a designer grow and expand whilst you've known them.
Masato and I catching up backstage.

Masato's collection for Manchester Fashion Week was revolved around black and grey as a base colour, which meant that when the metallic flair, avante guarde shoulders and sheer numbers were moulded around them it made every piece uniquely wonderful.

 
Carys Kaiser created this film which was launched on vimeo and if you watch 1 minute 50  seconds until 2 minutes 10 seconds you will see the parade of all the models at the end of the catwalk show. A little added bonus is that Masato actually pops out at the end to acknowledge the crowd and bow in a very shy and humble manner. I thought this was really nice as it was one of the only times that a designer came out on stage after the show.

<iframe src="http://player.vimeo.com/video/40619322?title=0&amp;byline=0&amp;portrait=0&amp;color=ffffff" width="400" height="225" frameborder="0" webkitAllowFullScreen mozallowfullscreen allowFullScreen></iframe><p><a href="http://vimeo.com/40619322">Manchester Fashion Week</a> from <a href="http://vimeo.com/user3488297">Carys Kaiser</a> on <a href="http://vimeo.com">Vimeo</a>.</p>

(@CarysKaiser if you want to track her down on facebook say hi from me.)

At Manchester fashion week one of the problems I was having was that not having a professional camera meant that not all my pictures came out brilliantly well as i couldn't zoom and the strong lighting needed for the catwalk was not my friend.

For Masato I decided to sit at the first seat, front row nearest the catwalk and then would take pictures  up close as soon as they came on to walk. This was a great theory, but in reality they walked a lot quicker then they had in my head. Silver lining was that my shoes and at least one leg is probably in every one else's photos so yay to leg fame.

Crankphoto (@crankphoto) arranged the photos playing on the screen like this one and he was also the photographer they used for their photo shoot for one of the up and coming projects they have lined up.


The models then came out to an audience who over the past years had already been told masato is the ' one to watch.' For me he didn't disappoint as i felt each piece stood on it's own, all could be worn and therefore a whole collection that is sellable will always be a good thing.

The collection had a little bit of everything. Dresses you've seen above.
  Jackets and thin trouserswith an inside out stitching running down the seams.

mid-length dresses that the average person could wear without putting too much on display.

 
gorgeous coloured skirts paired with the crisper cut jacket and patterned tights.


This jacket was lovely on the catwalk but it was even better up close. I know because i jumped backstage and took photos (with permission of course). I can't decide whether i like the baroque feel that I get from it, or the Japanese influence that creeps its way it subtley such in the jacket and more overtly in the some of the dresses.


This was my favourite piece as not only can you see thats its simply gorgeous, but the colour, the cut, the way it moved on the runway -- just ooh I loved it. The dress may have been my favourite piece when when catching up with Masato just before the show he showed me his favourite.


He said that while his collection may be seen as dark due to the use of black and grey he says its nice to use black. It was sweet that when i asked him if he was stressed before the show he said no. 'i'm not stressed, i worry for the best for the collection.' He explained that the stress comes in the months of designing and picking materials, collaborators, music etc and so when the day arrives it's not stress it's more  of a worry that after all this work people won't understand what you've done.

He does have a great team at the moment though which allows him to just focus on the collections. Jackie and Mike are part of Masato with Mike usually the person you see on twitter. The best bits are passed along as with sweeling interest it's hard for one person to manage it all.

The tights were all from Eve's legwear and i did try to get some shots of them as some of the detailing is great.
 
From catch fastenings to zips the knee lengths numbers were definately something I would have in my wardrobe. Speaking of my wardrobe I did manage to walk away with two pairs of tights compliments of Eve so thankyou muchly.
Wednesday I was given some lovely brown checkered tights and therefore i felt it only fair that I base an outfit around them for the Thursday. Rubbish self taken photo but you get the jist.

 
Red dress New Look, Jumper (back of my closet), Nica satchel bag, Studded rainbow shoes that are totally awesome and one of my fave pairs River Island and glasses necklace from Scarlett Hearts.

Thursday my tights were part of the goody bag and aptly names psychadelic pattern.


enquiries for these should be sent via e-mail sales@eveslegwear.co.uk
www.eveslegwear.com or twitter @eveslegwear

Jewellery for the show was Latimer Couture with this dynamic duo Helen and Jo beading their way into success


Some of the pieces they designed you would have seen on the catwalk but maybe thought it was part of the design.
 This was actually used as a belt with one of the pieces but is actually a necklace.


You can see here just how intricate the beading is with the colours ideally blended to the Masato collection.

I will say that I loved Helen when we met and if I had BFF's i would initiate her into being mine. She said that she didn't have a favourite but she does just love statement necklaces. She described how she wanted Latimer Couture pieces to be something people could have that would transcend from wearing it with jeans to then wearing at the opera. They should be an investment that you can have for all time and even use as a hand me down. I have seen the beading on these and they will definately last the test of time.

Overall it was a great show, he's a lovely designer with a barrel full of talented people alongside him to help him succeed. He will also be showing at Brighton Fashion Week and Liverpool Fashion Week.

http://www.masato.co.uk/
http://www.latimercouture.com/Latest-Collaboration--Masato.html
http://www.mcrfashionweek.com/


Frostinator Fashion xx

Popular Posts